{making}{cooking}{finding}{doing}{living}

Tuesday, October 28, 2014

{sneak peak} My Halloween costume

{making}

Just a quick post to give a little sneak peak at my Halloween costume..... I've actually already worn it for our annual Halloween party this past weekend, but I didn't really get any good pictures of me in it and actually it wasn't 100% finished (although it was basically done which is more than I can say for some year's costumes at the Halloween party lol).  So I will get some better  pictures of it, but I am super proud of it, and I think it's one of the coolest costumes I have ever made for myself, so here's a little sneak peak of it on my makeshift dress form as I was working on it. (I say makeshift dress form because it is actually my cw era corset stuffed with pillows and slid over the top of a step stool thingie..... not perfect but it worked pretty well for this..... of course only because I was wearing the corset with the costume lol.

I had decided that I wanted to be a broken porcelain doll for Halloween this year.  The very first part of the costume I made was the mask:
First I painted a dark gray undercoat on the entire mask
Then I coated it with crackle medium and then white paint to get an aged and cracked look:
After doing that I realized that I really needed to trim the mask down some to get it to fit over my nose correctly and give the look I wanted.  I also added some pink to the cheek:
And apparently I've yet to get a picture of the completely complete mask, but I also added some long eyelashed to the top and bottom of the eye opening.

Next I started working on a bonnet, that I still haven't quite finished
(and don't have pictures of as of yet) and preparing my design and materials for the dress itself, I REALLY wanted it to be taffeta (and I didn't want to spend a fortune on it) and had a horrible time finding a cheap taffeta that wasn't disgusting to the touch and that was the color pink I wanted..... I ended up finding a satin taffeta that I used the back side of the fabric instead of the front (since I didn't want a satin finish) and I bought it in white and dyed it.  Before I actually got started on sewing the dress though I had another accessory to make......

Shoes are always a bit of an issue for me for Halloween costumes..... I love shoes, but I hate actually wearing them, and am never comfortable in many for long.  Halloween costumes really push that issue because many times the shoes are an important part of the costume, but I'm also typically going to be doing a lot of walking and standing in them.
these are a couple of the pairs I've had over the past couple years, for a witch costume and a monster's ball gown costume respectively.  The black boots didn't do too bad..... I managed to wear them the entire party that year and thought they'd be fine for trick-or-treating, and I made it most of the evening in them, but ended up finishing the night barefoot.  The monster shoes were a pair of pumps from goodwill that I covered in pink craft fur, and yeah, they didn't even last the whole party (which I knew they'd be wear for pictures kinda shoes since I didn't want to pay more than $5 I just had to get whatever they happened to have at goodwill at the time)

So this year when I was planning my outfit I knew I wanted shoes with spats.  I planned on finding some cheap pumps and making spats, but I wanted to find ones that would be comfortable to at least maybe make it through everything, I was even willing to pay a little bit more for them.  But a pair with the height of heels I wanted, that were comfortable and within the price range I was willing to pay, and in a color that would work were not to be found.  Then one day I was at kmart and they had a buy one pair get one for $1 sale and I needed a pair of slip on shoes for fall anyway, and there was another pair that was pretty comfortable and I thought would work.  They had lower heels than I wanted, but I figured for a dollar I better get them and if I found something better later that would be fine since these were practically free.  I didn't end up finding any others so I went ahead with these.  They were originally a tan color so I spray painted them pink.  Next I started working on the spats.  I made them out of white stretch denim using a pair of tall boots to make the pattern.  I sewed up the seems and finished the edges with narrow pink binding and mocked up the approximate placement of the adorable little rose buttons I had gotten for them
After trying them on with the shoes though it suddenly dawned on me that since I had only paid $1 for the shoes and had already spray painted them anyway that it would be much easier to finish them and to wear them if I just glued them directly to the shoes to make little boots instead of adding a band around the bottom of the shoes and wearing them as spats.  So that's what I did.


So now on to actually making the dress itself (keep in mind that at this point it was Wednesday, the party was Saturday and I still had a lot to do to get ready for that and I would only have Wednesday, Thursday evening and Friday to get it all done.... I was a bit nervous about getting it all done to say the least) I had decided I wanted the dress to be Victorian style but just below knee length - more the length of a child's dress during the Victorian era than an adult dress.  I wanted a bustle skirt with an underskirt with a striped  pleated flounce around the bottom (you can kind of see why I have so much trouble finding fabrics sometimes, I am very specific about what I want).  Even though the skirt I was planning was going to be a little bit later Victorian style I planned on using the pattern for my Civil War Era ballgown bodice for the bodice for the costume, because it is easy to make, I've made it about 5 times now and could probably make it in my sleep, and I already have the pattern (also I hate patterns, especially modern ones so I really didn't want to have to get one for a different style bodice, but that's not something I thought I could do without some sort of pattern).  I did find some images of dresses with bustles that had similar bodices though so I didn't feel too bad about using it, plus I wasn't going for historically accurate costuming, I was going for Halloween costume.  (obviously since I cheated and just put a casing and elastic in the waist of the overskirt and a casing and a drawstring for the underskirt instead of pleating them to waistbands).  I actually hadn't decided for sure what I was going to do about the sleeves until after I finished the rest of the bodice and remembered that I had a shirt that would work well under it (and at that point anything that meant less sewing and therefor less time was definitely the way to go haha.... but I also really liked the way it looked). After sewing the bodice and starting trying to drape and bustle the skirt is when I realized I REALLY needed something to put it on other than myself to work on it and that's when I came up with my makeshift dress form.
after tacking and tying up the sides to form the front drape I moved on to deciding how I wanted it bustled in the back and sewing in the tapes for the bustling

  Then I was just left with the decorations I wanted to put on the skirt and deciding about the sleeves (you can see in these next pictures that I kind of shoved the shirt under the bodice to see how it might looked and liked it)

The only thing I didn't get done on the dress itself before the party was that I have some trim to sew onto the pleated flounce to cover the stitch line where it's sewed to the underskirt, but it looked fine without it so I used the time to do other stuff that needed to be done for the party..... I do plan on adding the trim this week before Halloween though.  Other than that it was accessories that I didn't get completely finished...... I had tights for my arms that I wore (so my arms would be white like porcelain) but I didn't get the crack lines drawn on them yet, and as I mentioned I still have to finish the bonnet for it as well.  I've also decided that I want to make a purse for it that will be big enough to not only carry my phone, but a pair of flip flops (just in case) for walking around trick-or-treating on Halloween night.

Like I said I am super proud of this costume and I plan on getting some good pictures of it on and completely finished (although that might actually have to end up happening after Halloween is over for time reasons).  I'm really looking forward to completely finishing it and getting to put it on again :)

Halloween {Part 2} {Halloween Decorations House Tour}

{living}

Finally getting the tour of all my Halloween decorations I promised posted! {yay}.... I was sick and then running around like a chicken with my head cut off trying to get ready for our annual Halloween party (which I was behind on because of being sick........) {I'll be posting about that later}.  But there's still a few days before Halloween and there's always next year, if you want to steal any of my ideas ;).  I don't go quite as all out with Halloween decorations as I do for Christmas (although I do a little more than I do for some of the other holidays), so while I call this a "house tour" it's actually only a few rooms and the front yard, I do plan on continuing to expand and add to my Halloween decorations though each year so it may get to be a little more thoroughly distributed thoughout the house eventually (there were actually a few things I wanted to do this year - especially for the kitchen- that didn't end up getting done, so I may start on stiff for next year as soon as this year is over).  Enjoy!


{Front Yard}
Ghost dresses I made from Chicken Wire and white spray paint in the front side yard, you cant see it too well in the picture but there's also a chicken wire butterfly/moth on the bench

a little bit closer view of the ghost dresses
graveyard in the front garden (I have had quite a time with these gravestones over the years.  I bought them I think from Dollar Tree years ago, but the little stakes that came with them never held them into the ground well enough and they'd fall down and blow around the yard, so then I tried gluing the metal stakes in last year but they still didn't really go deep enough into the ground so this year I unbent some wire hangers and taped them to the back with packing tape and made sure they were a lot longer to go into the ground..... the backs look like a hot mess, but they haven't budged!)
Ghost pumpkin carriage I made.... it used to have a door.... I'm not sure what happened to it....

{Front Door}

I made this 4 or 5 years ago, and I still love it.

{Hallway}

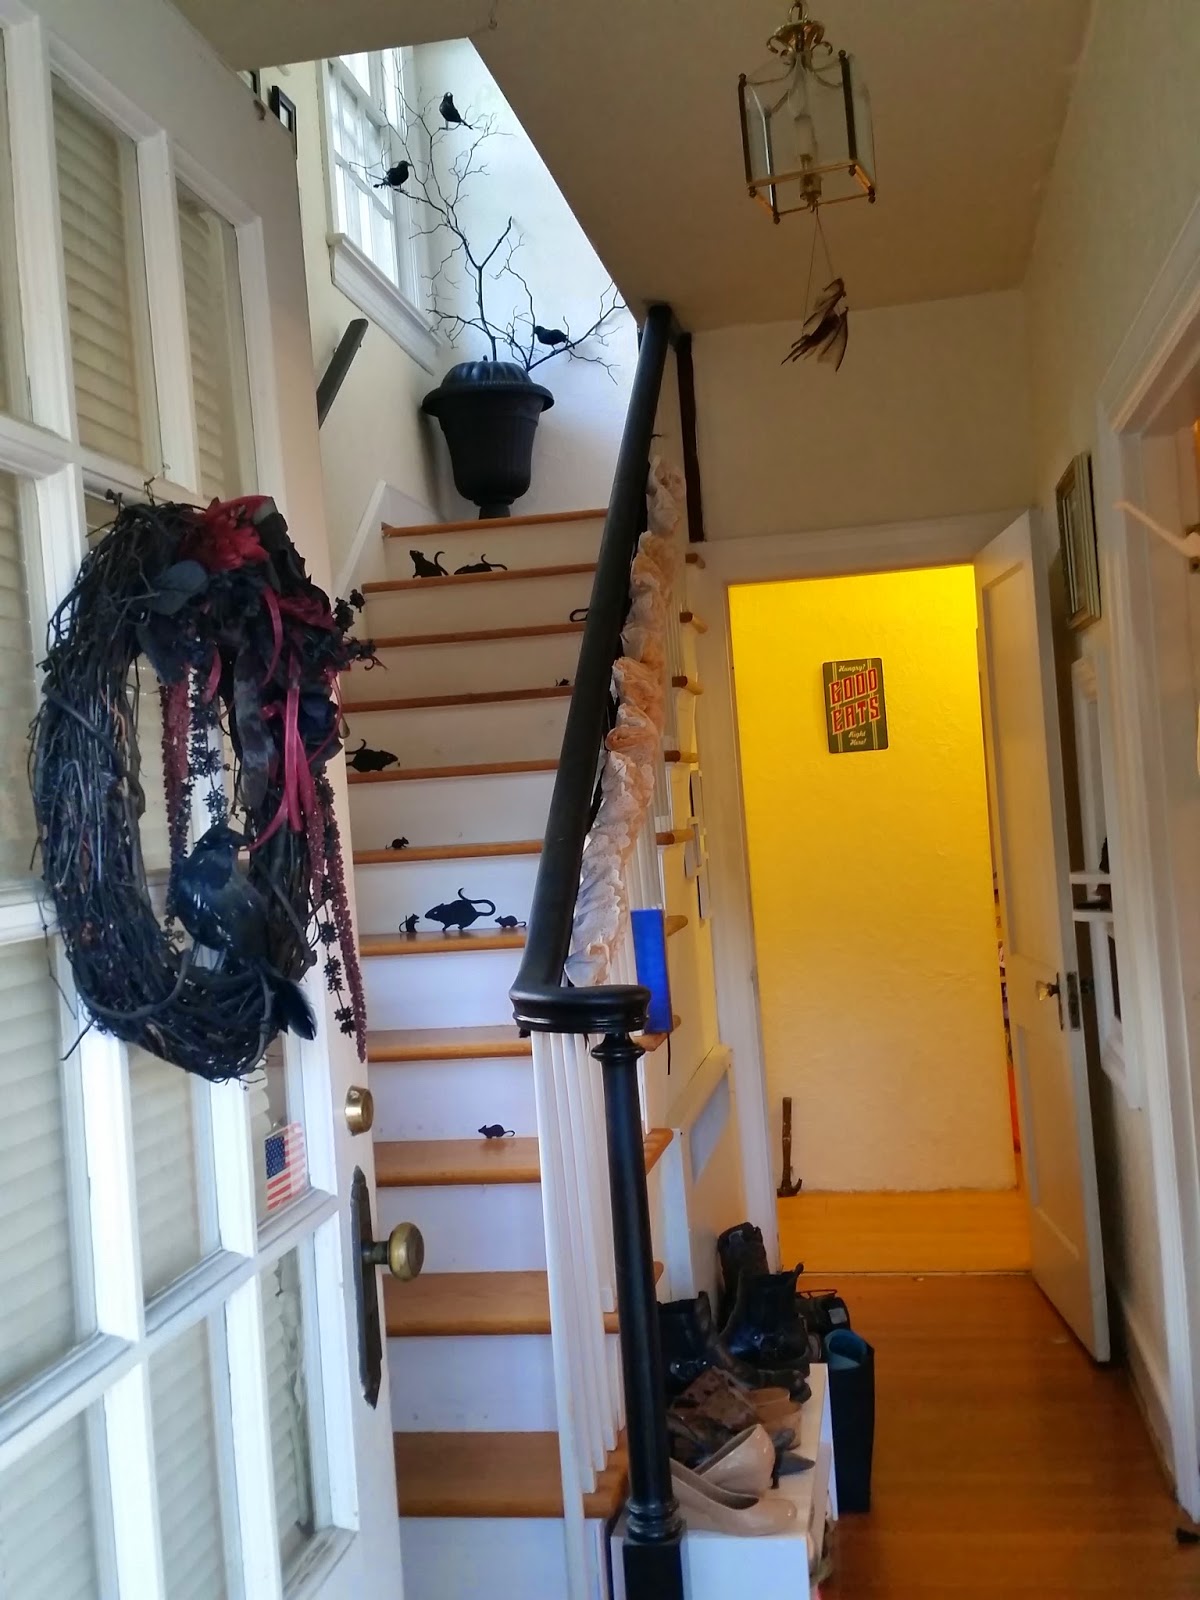
looking through our front door

Mice and rats on the stairs

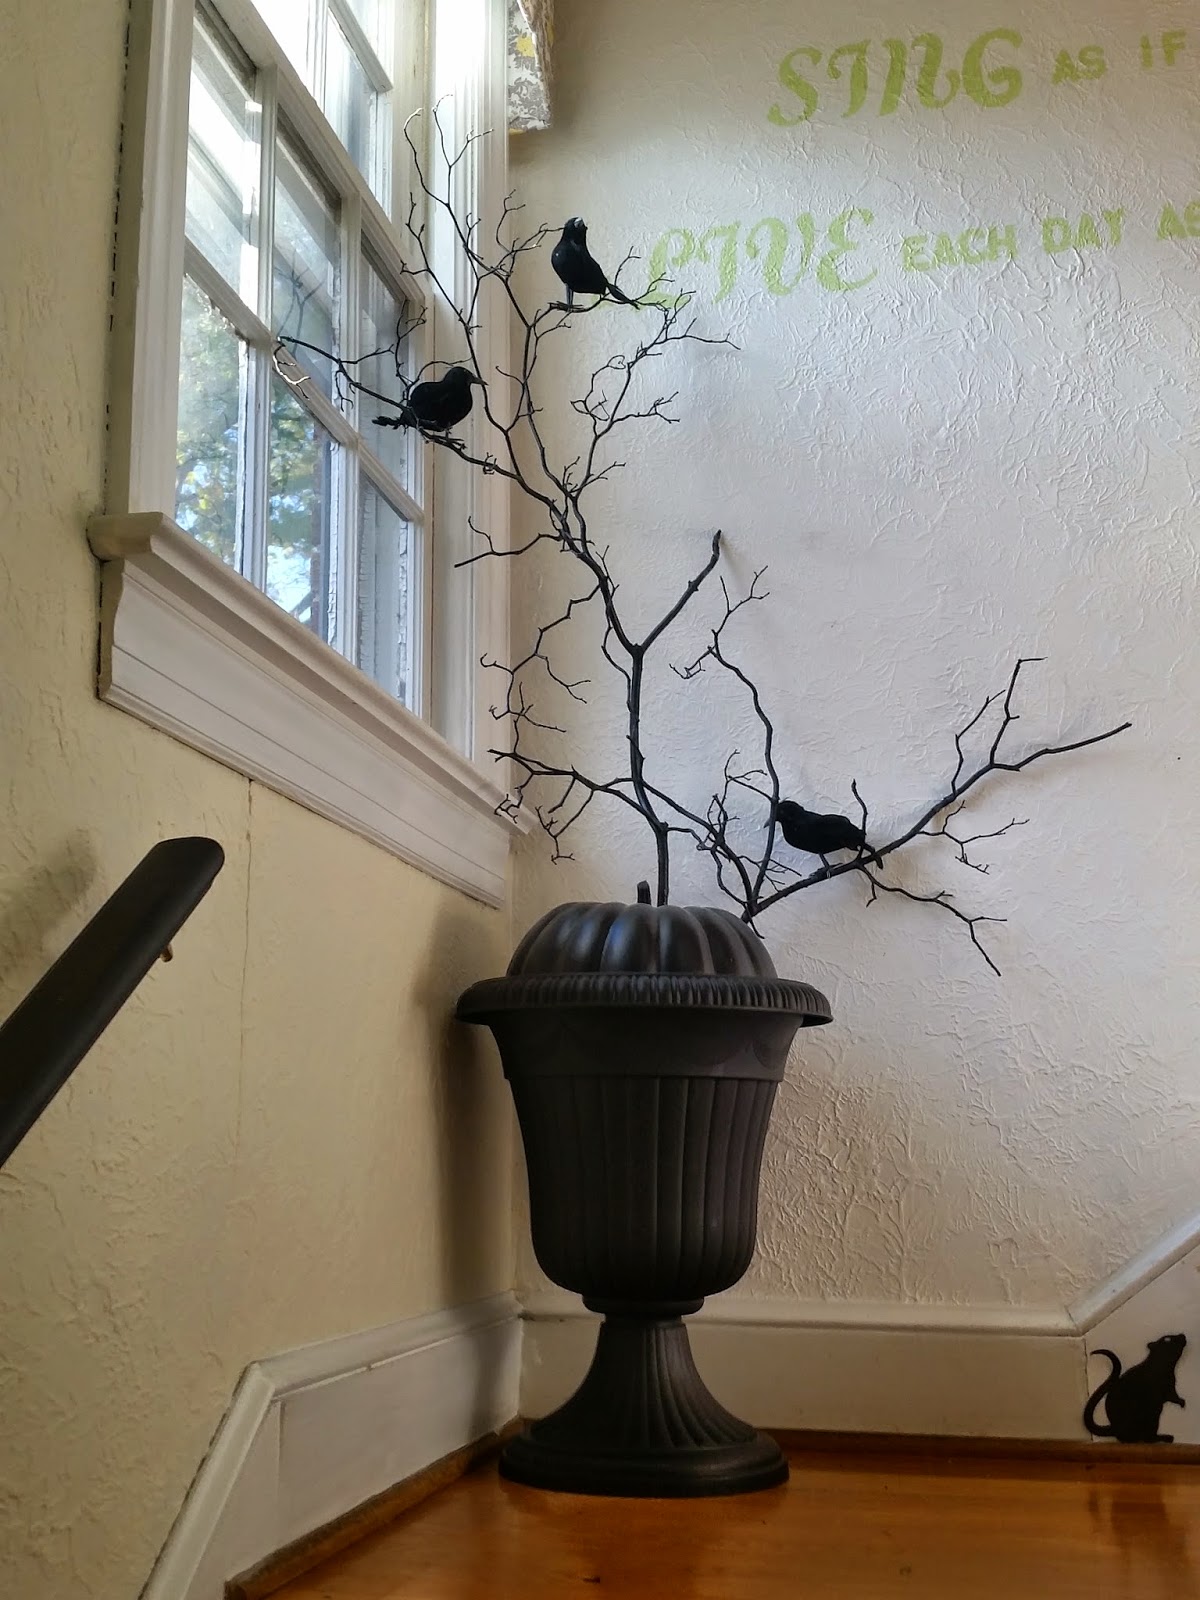
one of my new decorations for this year..... I had gotten the urn on clearance at Kmart at the end of summer and had planned on doing some sort of outdoor Halloween decoration with it, but I also meant to go back and get a second on possibly for that and didn't and I decided I needed something right at the top of this section of the stairs here (it turns and there's 4 more steps) and I'm so glad I used it here instead of outside!

closer view,,,,, the branches were from our backyard and I just spray painted them black, the large black pumpkin I had picked up last year on clearance just after Halloween with no clear idea of exactly where I would use it (glad that worked out lol) - it's holding the branches in place  - and the birds were from Dollar Tree

my Halloween garland for the bannister.... the idea came from one of the Better homes and Gardens Halloween Tips and Tricks magazines (I think it was 2 years ago)...... I keep forgetting I need to make it a bit longer though.......

this little alcove in our hallway was originally where the houses telephone went, of course that has long since been relocated, so now it's just an extra little space for me to decorate!

A ghostly image in the mirror

a little decoration hanging from the coat closet

close up of one of the little mousies

and another close up....
I wanted to add a little bit better look at this little guy too, because he started out life as a small plastic pot from Dollar Tree, a wooden candlestick, a mini canvas, and a weird little Easter tree I got on clearance after Easter from Dollar Tree years ago and never knew what to do with..... but a little hot glue and some black spray paint (or orange spray paint..... you'll see an orange one in the kitchen) and it became the perfect little decoration, I was so thrilled with how they turned out!


{Living Room}

looking into the right side of the living room from the Hallway

I won't give too much description on these pictures since I already posted them a few weeks ago, but here's a view of one of my Halloween pillows and the Halloween floral arrangement

more Halloween pillows..... they are a combination of ones I've made and ones I've bought
the windows normally just have the honeycomb shades (I think that's what they're called) on them, the Halloween window treatments are simply made from black cardstock and back and gray "creepy cloth"


I love decorating the mantel for different holidays and seasons

This is actually supposed to be a haunted doll house, but since I only have a couple of the rooms inside finished it works perfectly here for now..... when I get the inside done I think I'll get a mirror to sit behind it so you can see the rooms..... either that or get some sort or lazy susan to out it on
"graveyard" littered with black {glittery!} mini pumpkins

spooky forest (if you can call one black {glittery!} spooky tree and a picture of a masquerade in the woods a spooky forest lol)

this is on the other side of the living room...... I've started trying to get my monogram wall done so some of my "B"'s have been hung, so as well as a cheesecloth ghost on the little table I added a few "o"'s so one of the b's would say "boo" (I might do more of them next year)

cheesecloth ghost

{Kitchen}

 
obviously I took this picture a while ago, but I thought 13 days til Halloween was the best day's picture to post ;)

as you may have noticed for the rest of my Halloween decorations I tend to stick more to the black and burgundy/dark purple color scheme, but since orange is an accent color in my kitchen anyway I use orange and jack-o-lantern themes stuff in here

and also things that are kind of kitchen related.... such as these punched can jack-o-lanterns

and this canning jar lid pumpkin

and that painted jar jack-o-lantern..... oh and that's the orange Halloween tree I mentioned earlier

another little bit of "chalkboard" art..... (it's actually just black cardstock, but I did draw it with chalk)

close up of the orange Halloween tree and painted jar

my chalkboard door panel on the door leading out of the kitchen into the craft room


Wednesday, October 15, 2014

A Super quick and easy project: Boyfriend meets Boho shirt makeover

{making}


    As I was planning outfits and locations for our annual "fall pictures" I was looking for a new shirt for myself because I didn't want to wear anything that I currently had for the pictures.  I had originally thought I wanted a plaid shirt (we had decided to do the pictures in the Mountains on Skyline Drive and get another use out of our annual pass) and I even bought one, but then I was in the men's department of Walmart one day looking for something for my hubster and I found a shirt in a color I just loved (it's actually a little more towards aqua in person then it looks in these pictures).  It was solid color not plaid (which I decided would be better actually because my husband was wearing a plaid shirt and I thought the two plaids might not go as well together as I would have liked), and it was a man's shirt, but I really wanted it for the pictures.  So of course I knew it would just need  little makeover......

    Of course you can find probably a million hundred or more makeovers for men's shirts online, but this one is a little different, because most of them are taking an oversized shirt and making it more fitted for women in some way.  In this case I was buying the shirt new so I didn't nessicarily have to buy it too big.  But the problem with men's shirts (for me anyway) is that to get them to fit my shoulders and chest relatively well they are too tight across my hips and to get them to fit across my hips they are huge on my upper torso.  I had seen a pin on pinterest where someone had used a lace panel inserted into the side seem of a too tight tshirt to make it fit better, and I thought I would do something similar here.  And it was such a simple project that I ended up only taking one picture of the process......

    I started with a shirt that {basically} fit me up top (or course it's a men's shirt so it won't be perfect, but honestly for me women's shirt are rarely a perfect fit in the upper half either, and I do like that the men's shirts have a little more room in the upper arms). and of course as expected it was too tight across the hips

    The next step was to measure the distance between the shirts hem and my waist (or just slightly above) along the side seem of the shirt. Then all that's left to do is cut the side seem open from the hem of the shirt to the waist (using the measurement) and cut a triangle/wedge of lace (also using the waist to hem measurement) {I bought a quarter of a yard of the lace and that was more than enough... I did use the whole width though so if you want a really wide panel, especially if you wear a bigger size you might want to get a half a yard and cut it down}, pin the lace onto the outside of the shirt in the opening, overlapping the edges some, and sew it on.  (for a less Boho look you could also sew it so that the raw edges of both shirt and lace are to the inside, but 1: that's a little more complicated to pin in and sew, and 2: I actually had tried that first on this shirt and I didn't like the way it turned out (although I do think it would work on other shirts, I think it didn't look right on this one because of the way I cut the seem open because I cut on both sides of the original side seem), and of course repeat on the other side

    And voila! it creates a shirt that I can only think to describe as boyfriend meets boho (I loved how it turned out I might actually do it again, because I'm often seeing men's shirts that I like the color of..... and, at Walmart anyway, they are often cheaper then women's shirts.... this shirt and and the lace for it combined actually cost less then a women's shirt I had bought there a week before......).  For our pictures I paired the shirt with a scarf, a pair of dark blue skinny jeans, and tall dark brown boots.