{making}{cooking}{finding}{doing}{living}

Tuesday, October 28, 2014

Halloween {Part 2} {Halloween Decorations House Tour}

{living}

Finally getting the tour of all my Halloween decorations I promised posted! {yay}.... I was sick and then running around like a chicken with my head cut off trying to get ready for our annual Halloween party (which I was behind on because of being sick........) {I'll be posting about that later}.  But there's still a few days before Halloween and there's always next year, if you want to steal any of my ideas ;).  I don't go quite as all out with Halloween decorations as I do for Christmas (although I do a little more than I do for some of the other holidays), so while I call this a "house tour" it's actually only a few rooms and the front yard, I do plan on continuing to expand and add to my Halloween decorations though each year so it may get to be a little more thoroughly distributed thoughout the house eventually (there were actually a few things I wanted to do this year - especially for the kitchen- that didn't end up getting done, so I may start on stiff for next year as soon as this year is over).  Enjoy!


{Front Yard}
Ghost dresses I made from Chicken Wire and white spray paint in the front side yard, you cant see it too well in the picture but there's also a chicken wire butterfly/moth on the bench

a little bit closer view of the ghost dresses
graveyard in the front garden (I have had quite a time with these gravestones over the years.  I bought them I think from Dollar Tree years ago, but the little stakes that came with them never held them into the ground well enough and they'd fall down and blow around the yard, so then I tried gluing the metal stakes in last year but they still didn't really go deep enough into the ground so this year I unbent some wire hangers and taped them to the back with packing tape and made sure they were a lot longer to go into the ground..... the backs look like a hot mess, but they haven't budged!)
Ghost pumpkin carriage I made.... it used to have a door.... I'm not sure what happened to it....

{Front Door}

I made this 4 or 5 years ago, and I still love it.

{Hallway}

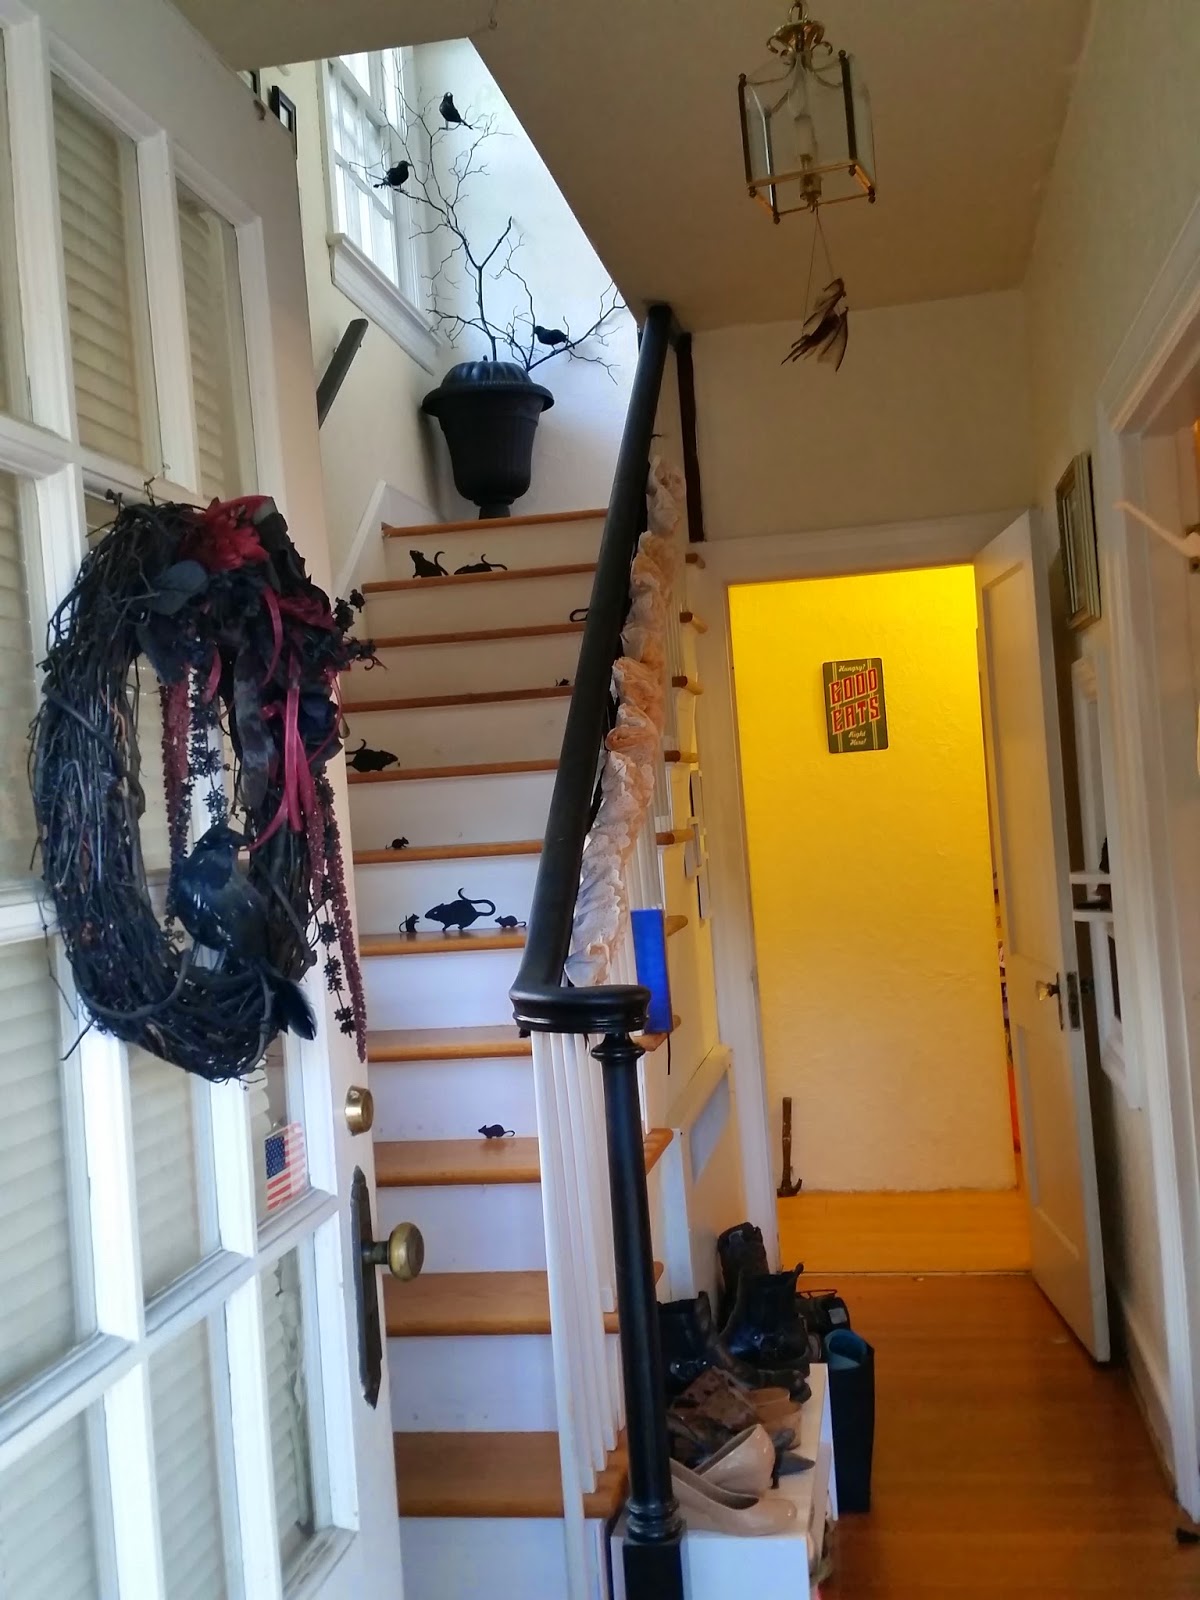
looking through our front door

Mice and rats on the stairs

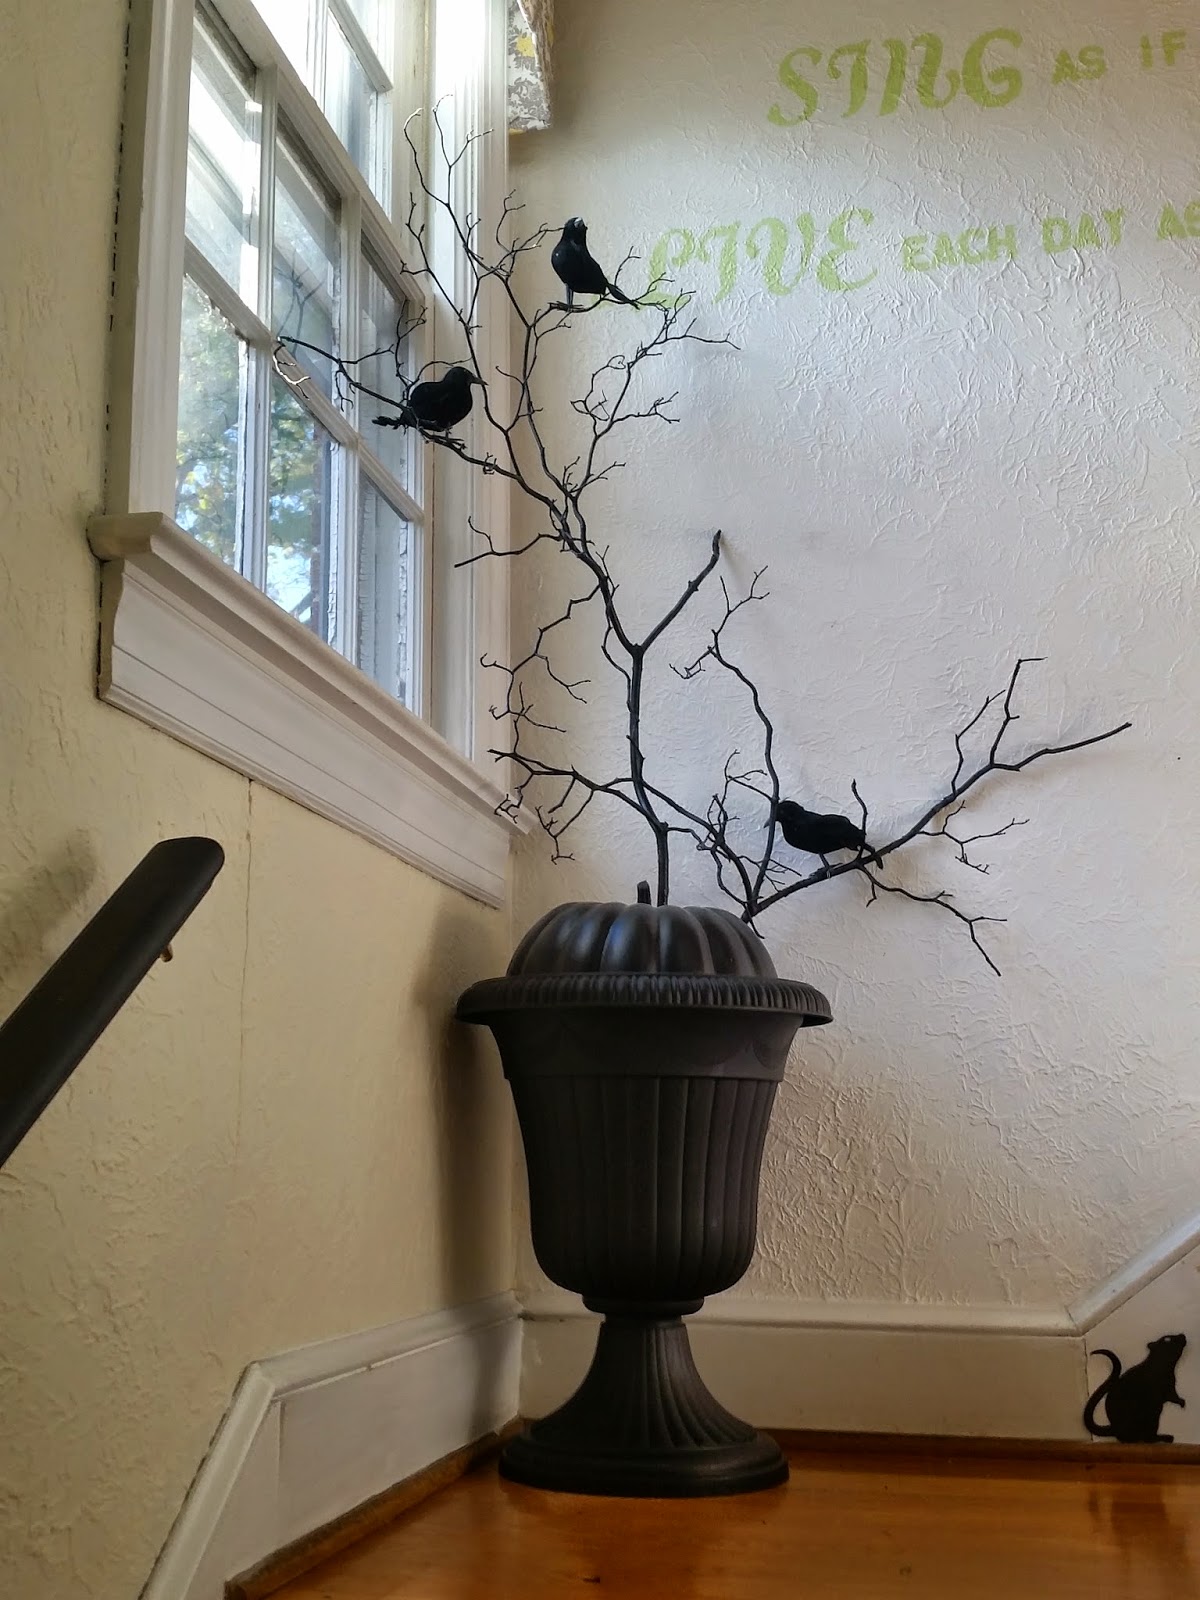
one of my new decorations for this year..... I had gotten the urn on clearance at Kmart at the end of summer and had planned on doing some sort of outdoor Halloween decoration with it, but I also meant to go back and get a second on possibly for that and didn't and I decided I needed something right at the top of this section of the stairs here (it turns and there's 4 more steps) and I'm so glad I used it here instead of outside!

closer view,,,,, the branches were from our backyard and I just spray painted them black, the large black pumpkin I had picked up last year on clearance just after Halloween with no clear idea of exactly where I would use it (glad that worked out lol) - it's holding the branches in place  - and the birds were from Dollar Tree

my Halloween garland for the bannister.... the idea came from one of the Better homes and Gardens Halloween Tips and Tricks magazines (I think it was 2 years ago)...... I keep forgetting I need to make it a bit longer though.......

this little alcove in our hallway was originally where the houses telephone went, of course that has long since been relocated, so now it's just an extra little space for me to decorate!

A ghostly image in the mirror

a little decoration hanging from the coat closet

close up of one of the little mousies

and another close up....
I wanted to add a little bit better look at this little guy too, because he started out life as a small plastic pot from Dollar Tree, a wooden candlestick, a mini canvas, and a weird little Easter tree I got on clearance after Easter from Dollar Tree years ago and never knew what to do with..... but a little hot glue and some black spray paint (or orange spray paint..... you'll see an orange one in the kitchen) and it became the perfect little decoration, I was so thrilled with how they turned out!


{Living Room}

looking into the right side of the living room from the Hallway

I won't give too much description on these pictures since I already posted them a few weeks ago, but here's a view of one of my Halloween pillows and the Halloween floral arrangement

more Halloween pillows..... they are a combination of ones I've made and ones I've bought
the windows normally just have the honeycomb shades (I think that's what they're called) on them, the Halloween window treatments are simply made from black cardstock and back and gray "creepy cloth"


I love decorating the mantel for different holidays and seasons

This is actually supposed to be a haunted doll house, but since I only have a couple of the rooms inside finished it works perfectly here for now..... when I get the inside done I think I'll get a mirror to sit behind it so you can see the rooms..... either that or get some sort or lazy susan to out it on
"graveyard" littered with black {glittery!} mini pumpkins

spooky forest (if you can call one black {glittery!} spooky tree and a picture of a masquerade in the woods a spooky forest lol)

this is on the other side of the living room...... I've started trying to get my monogram wall done so some of my "B"'s have been hung, so as well as a cheesecloth ghost on the little table I added a few "o"'s so one of the b's would say "boo" (I might do more of them next year)

cheesecloth ghost

{Kitchen}

 
obviously I took this picture a while ago, but I thought 13 days til Halloween was the best day's picture to post ;)

as you may have noticed for the rest of my Halloween decorations I tend to stick more to the black and burgundy/dark purple color scheme, but since orange is an accent color in my kitchen anyway I use orange and jack-o-lantern themes stuff in here

and also things that are kind of kitchen related.... such as these punched can jack-o-lanterns

and this canning jar lid pumpkin

and that painted jar jack-o-lantern..... oh and that's the orange Halloween tree I mentioned earlier

another little bit of "chalkboard" art..... (it's actually just black cardstock, but I did draw it with chalk)

close up of the orange Halloween tree and painted jar

my chalkboard door panel on the door leading out of the kitchen into the craft room


Wednesday, October 15, 2014

A Super quick and easy project: Boyfriend meets Boho shirt makeover

{making}


    As I was planning outfits and locations for our annual "fall pictures" I was looking for a new shirt for myself because I didn't want to wear anything that I currently had for the pictures.  I had originally thought I wanted a plaid shirt (we had decided to do the pictures in the Mountains on Skyline Drive and get another use out of our annual pass) and I even bought one, but then I was in the men's department of Walmart one day looking for something for my hubster and I found a shirt in a color I just loved (it's actually a little more towards aqua in person then it looks in these pictures).  It was solid color not plaid (which I decided would be better actually because my husband was wearing a plaid shirt and I thought the two plaids might not go as well together as I would have liked), and it was a man's shirt, but I really wanted it for the pictures.  So of course I knew it would just need  little makeover......

    Of course you can find probably a million hundred or more makeovers for men's shirts online, but this one is a little different, because most of them are taking an oversized shirt and making it more fitted for women in some way.  In this case I was buying the shirt new so I didn't nessicarily have to buy it too big.  But the problem with men's shirts (for me anyway) is that to get them to fit my shoulders and chest relatively well they are too tight across my hips and to get them to fit across my hips they are huge on my upper torso.  I had seen a pin on pinterest where someone had used a lace panel inserted into the side seem of a too tight tshirt to make it fit better, and I thought I would do something similar here.  And it was such a simple project that I ended up only taking one picture of the process......

    I started with a shirt that {basically} fit me up top (or course it's a men's shirt so it won't be perfect, but honestly for me women's shirt are rarely a perfect fit in the upper half either, and I do like that the men's shirts have a little more room in the upper arms). and of course as expected it was too tight across the hips

    The next step was to measure the distance between the shirts hem and my waist (or just slightly above) along the side seem of the shirt. Then all that's left to do is cut the side seem open from the hem of the shirt to the waist (using the measurement) and cut a triangle/wedge of lace (also using the waist to hem measurement) {I bought a quarter of a yard of the lace and that was more than enough... I did use the whole width though so if you want a really wide panel, especially if you wear a bigger size you might want to get a half a yard and cut it down}, pin the lace onto the outside of the shirt in the opening, overlapping the edges some, and sew it on.  (for a less Boho look you could also sew it so that the raw edges of both shirt and lace are to the inside, but 1: that's a little more complicated to pin in and sew, and 2: I actually had tried that first on this shirt and I didn't like the way it turned out (although I do think it would work on other shirts, I think it didn't look right on this one because of the way I cut the seem open because I cut on both sides of the original side seem), and of course repeat on the other side

    And voila! it creates a shirt that I can only think to describe as boyfriend meets boho (I loved how it turned out I might actually do it again, because I'm often seeing men's shirts that I like the color of..... and, at Walmart anyway, they are often cheaper then women's shirts.... this shirt and and the lace for it combined actually cost less then a women's shirt I had bought there a week before......).  For our pictures I paired the shirt with a scarf, a pair of dark blue skinny jeans, and tall dark brown boots.

Tuesday, October 14, 2014

Home-made Homemaking: reusable dusters and swiffer pads

{making}

For probably about a year now, I've been really into not using chemicals in cleaning (and of course trying not to eat foods that are not entirely actual food), and into as much being homemade as possible.  Of course Pinterest is a great source for all sorts of tips and tutorials for this type of housekeeping.  I've found the benefits to be numerous, typically I've been able to accomplish housework, in a more healthy, typically cheaper, and often more effective manner. {for example, I have completely stopped buying and using chemical cleaning products, all of my cleaning is done using baking soda, vinegar, water, hydrogen peroxide, or some combination of those, or Bon Ami cleaner. You can find this at Walmart for $.88 and it is an all natural cleaning powder and it is amazing)  So I am going to start a new series here on the blog called Home-made Homemaking, to share some of the different things I try, that fit into this kind of back to basics/diy/homemade housekeeping, and what some of my experiences with them are.

I recently decided to try making home made laundry detergent but, I haven't gotten a chance to actually try that out yet (I hate going into our basement to do laundry so I've always made sure I had enough unmentionables, etc. to not have to do laundry very often (and I might have a lot of clothes too) I think my record is being able to go a whole month between laundry days.  My husband however wants laundry done a lot more often then I need to do my own and he just does his those times, so he's used the detergent but I haven't actually used it yet myself, I'm coming up on needing to do some laundry for myself though pretty soon here so I'll review that shortly, but for this first post I'm going to share some reusable dusters and "swiffer" pads I made.  I saw many posts about these on Pinterest and didn't really follow any one tutorial or anything but if you look on Pinterest, like I said, you'll find plenty of results for both of these.

{Reusable Duster Cover}
sorry, I forgot to get a picture before I tried it out..... but you can see how well it picked up the dust....
I love, love, love this! It actually works better than the disposable ones I used to buy I think.  And of course the other benefits - I don't have to keep spending money on something that's only going to get thrown away; I'm not creating as much trash (which believe me in this house, as often as trash day is forgotten until after the trash truck comes through, is a good thing); and I can make them in whatever colors I want, to coordinate all my cleaning supplies (I'm a bit OCD, as well as being very into color and design so this is actually a serious benefit for me).  Rather than buying fleece from the fabric department I just bought a $2.88 fleece throw from Walmart..... now yes I probably could have gotten a smaller amount of fleece from the fabric department and paid less and just only had enough to make one or two, but for the amount of fleece I got and the number of these duster covers I can make from it, it was definitely a great price (especially considering one package of the disposable duster covers are I think at least $3 something.  This duster cover is made from 4 layers of the fleece (but you could probably make it a little thicker and fluffier with a few more layers) I sewed the sleeves for the handle to slip into by sewing the outside and top edges on the top two layers and then sewed the bottom two layers and the top layers as one stack down the middle to divide the sleeves.  It was so quick and easy to make, I didn't even measure anything, just laid the handle on top and marked where seems needed to be, the only thing to do other than sew those few seams was to cut the edges so they would have all the little sections.

{Reusable "Swiffer" pads}
I hadn't gotten Velcro yet when I tried it out and took this picture so if you look closely you can see it's pinned on instead of Velcro-ed
These were a little more complicated to make, but worth the effort.  Most of the ones I saw on Pinterest seemed to be made of terry cloth, so I bought one of the super cheap towels they sell at Walmart to make this from (another $2 and some change).  Again I didn't use a pattern I just drew up a pattern using my Swiffer as reference.  I sewed around the edges leaving a small opening, turned it inside (right side) out and closed the hole and topstitched around the edges.  It was a little difficult in a couple places getting all that terrycloth through the sewing machine, and I think when I make more I might try just using a cotton or something for the side that goes against the swiffer, I was thinking this way they would be reversible, so I could use them for longer before they needed to be washed, but that doesn't really work anyway, unless I were to sew Velcro on both sides.  After I sewed it all up I sewed on Velcro to hold the flaps together over the swiffer. (In the picture if you look closely you will see I just have straight pins holding them together.... I didn't have any Velcro and needed to go get some but I didn't want to wait to try it out).  Now I'm not sure the terry cloth works quite as well as the disposable pads do on picking up dust and such from the floors, and I think I might try making one from the fleece and see how that works, but what the terry cloth is great for is for damp cleaning.  I use a baking soda, vinegar, water, dish soap mix for mopping the kitchen floor, but I had been using Swiffer wet pads for the bathroom floor and occasionally on the wood floors in the rest of the house when they needed more than sweeping, but after making this I mixed up a spray bottle of water and vinegar and misted the floors with that and then went over them with the terrycloth pad and it worked great! If the fleece ends up working better for dry "Swiffering", then I will just make a couple of both and use them for the different purposes.

So these are definitely a win, and relatively quick easy little projects I would definitely suggest making to add to your cleaning tools.

Theme Food Week: From Dr. Frankenstein's Kitchen {October}

{cooking}

What? Theme Food Week again already? Well, yes. As it turned out this month's Theme Food Week ended up following pretty closely on the heels of September's. You see, my parent's will be out of town for parts of 2 of the weeks, and then the week after that is the last week of the month (and we were trying not to squeeze it in at the very end of the month - like last month) so this past week it was.........

As you may have noticed there is a trend right now for food smash-ups.  There's even a food contest show called FrankenFood, all about new smashed up food creations, and there was an article in a recent issue of Rachel Ray magazine with several different smashed up recipes (2 of which were meals this week). And what better theme for October than dishes that are as much a combination of  random foods as Dr. Frankenstein's monster was a combination of parts. So as the monster came from Dr. Frankenstein's labratory perhaps these meals have come straight from.............

Dr. Frankenstein's Kitchen

{Menu}

Monday:Applebutter BBQ pulled Chicken Mac and Cheese with cornbread and green beans
{Pulled Chicken Mac and Cheese}
Ingredients:
-2-3 boneless Skinless Chicken Breasts (depending on size, I used 3 but they were pretty small)
-18 oz. BBQ Sauce (I used the applebutter bbq sauce that I've been getting from a local farm market Miller Farms Market...... it is delicious, but you can use whatever your favorite sauce is)
- Vinegar
- 1 box Pasta (elbows, nuggets,mini shells, bowties, rotini, etc.) cooked and drained
- 4 Tbs butter
- 4 Tbs Flour
- 2 cups milk
- 2 cups shredded cheese (I used colby jack to go with the applebutter bbq sauce, but you could choose a different cheese if you'd like)
- Salt and Pepper
- Dry mustard

Prepare Pulled Chicken
{1}Place chicken breasts in a pot with enough water to cover them and a spoonful of bbq sauce and a little bit of vinegar.  Bring to a boil
{2} Boil chicken until done through (usually about 20-30 minutes, but I've had it take longer and I've had it take less time, depending on the size of the breasts, so make sure you check that they are actually done.)
{3} Using two forks (or however you want to do it) shred the chicken
{4}(after dumping out the cooking water) return the shredded chicken to the pot and mix in remaining bbq sauce.  Heat, stirring every so often, over low-medium heat, until heated through.

Prepare Mac and Cheese
{1} Melt butter in a medium saucepan over low heat
{2} slowly add flour to melted butter, stirring continually as you do to avoid clumping. (you can use a whisk or spoon for this step, but you will need a whisk for the next step) Cook continuing to stir/whisk over low heat until a paste forms (just a minute or two)
{3} Slowly add milk whisking constantly to avoid lumps.  Increase heat to medium-high and continue to whisk/stir until sauce thickens and bubbles
{4} Add Cheese and cook until completely melted.  Season with salt and pepper to taste, and add a pinch or two of dry mustard (it enhances the cheese flavor.  I even do this with box mac and cheese)
{5} Mix cheese sauce into cooked,drained pasta

Combine Pulled Chicken and Mac and Cheese
{cornbread} I just used a Martha White cornbread mix
{green beans} yeah.... I just warmed up canned green beans

Tuesday: off night

 Wednesday:Spaghetti Tacos w/ toppings bar with roasted corn (kernels)
{Spaghetti Tacos} Cook your spaghetti as you usually would and add sauce, again as normal, then use that spaghetti to fill crunchy taco shells (leave room for toppings), our toppings bar included, ground beef, sauteed mushrooms, black olives, jalapenos, and shredded mozzarella cheese
{Roasted corn} drizzle frozen corn kernels with olive oil and season with salt, pepper, and garlic powder, spread on a baking sheet (still frozen) and broil for about 5 minutes.

the chicken "crust" on these seemed a little thick to me, but that could have just been me, it also could have been that my "crusts" were a little smaller around and therefore thicker than they were supposed to be since I only have 2 8 inch round cake pans and I left them at home (and was fixing these at my parents house) anyway, so I just estimated the size wrapped them in plastic wrap stacked them on a plate and froze them...
Thursday: Chicken Parm Pizzas and broccoli
{Chicken Parm Pizzas} the recipe is here.... this is one of the ones from Rachel Ray.... instead of just leaving it as is with the cheese on top I made ours a little more pizza-y by adding toppings such as mushrooms, black olives, and jalapenos (different toppings for different family members..... except mine, mine just had the cheese because, as you may have noticed, the toppings were leftover ingredients from the night before and I don't like mushrooms, black olives, or jalapenos lol) of course you could use any other topping you wanted, I wish I had thought to get mini pepperonis, I think that would have been good.
{broccoli} I just steamed the broccoli (although I didn't pay enough attention and way overcooked it so it ended up being more like broccoli mash by the time I mixed in a little butter and salt haha oops)

My ramekins are slightly smaller than what is called for in the recipe and so the "buns" were going to be a bit smaller, in trying to make the burger a little smaller to fit them better they ended up so thick we could hardly eat the whole sandwich.... I think next time I will go with thinner and the burger hanging over the edges a bit lol.
Friday: Ramen Cheeseburgers with homemade fries
{Ramen Cheeseburgers} another Rachel Ray recipe...... you can find it here, and of course since there were 4 of us I doubled it, as I did with the Chicken Parm recipe (although it probably could have fed 4 people, because I don't think any of us actually finished our whole pizzas, but I wanted to do an individual one for each person, since we were doing different toppings).  We really liked these, but my husband says he would have likde to change the toppings up a little and take it a little more away from the typical American burger.  Also we didn't use the siracha mayo that the recipe calls for we just used regular ketchup/mustard/mayo
{Homemade Fries}I just cut up several potatoes, toss them with olive oil, salt,pepper, garlic powder, and a little paprika and bake at 425 until done (the time varies depending on the type of potato, size of the fries, etc., but plan on it at least taking probably 15 minutes at the least, probably it will be more like 20-30, unless you have cut them awfully thick or thin - and that's based on using regular russet potatoes, red or white potatoes cook faster generally)

{P.S. I'm super excited about next month's Theme Food Week.... since it will be November the theme will be "Thanksgiving Deconstructed" .... what exactly does that mean? you might ask..... stay tuned and find out...........}

Friday, October 10, 2014

Halloween {part 1}

{living}


I have been busy busy this week trying to get some back logged housework done as well as getting decorated for Halloween (and making some new decorations), I still haven't gotten all the decorations up and new ones made, but today feels like its going to be a do nothing kind of day (except for making dinner, since we are just finishing up another Theme Food Week - I'll be posting about that sometime this weekend).  I was going to wait until I got all the decorating finished and post a "tour" of all my Halloween decorations, but since that is taking longer than I had hoped I decided to give a little "sneak peek" of some of the decorations in the living room. (Sorry for the poor quality pictures, I just snapped them real quick this morning and the lighting wasn't great..... I'll try to get some better pictures when I do the whole decorations tour)


view looking into the living room from the front hall (just the one side of the room though..... the other side is a mess and still needs some pillows made for the chair on that side lol)
the pillows are a mix of ones I've bought and ones I made

I love having a bunch of different throw pillows to easily change out for different seasons or holidays, it's a quick was to decorate.  I like to change out small decorations like flower arrangements too (there's normally a butterfly topiary on that table)
normally the windows just have the honeycomb blinds on them, swags are made from black poster board and black and gray cheesecloth/"creepy cloth"
the mantel decorations....... haunted house, abandoned graveyard, a full moon, bats winging off through the night, and a spooky "forest" 
this is actually a haunted dollhouse that I've been working on for a while now.... I don't have all the rooms inside done though, but I want to get a mirror to set behind it so that you can see the inside too.  The full moon is a round mirror that came out of a frame that I used to make a beanbag toss game a couple years ago for a Valentine's day party.  The mirror had just been laying around waiting for a purpose...... the bats I just cut from black construction paper and taped up on the mirror and wall.
The spooky "forest"..... which consists of a picture of some 18th century people having a masquerade in the woods and a black {glittery!} cardboard tree....... and of course some pomanders and an owl..... lol
abandoned graveyard littered with black {glittery again!} pumpkins...... the headstones I cut from some balsa wood, then used a ballpoint pen to write on them and used an inkpad to give them some uneven weathered color
Once I get the rest of the decorations finished I will post all the decorations with a tour of the decorated rooms.  And of course the upcoming post on this month's Theme Food Week, and I have a couple more things up my sleeve, including a new series that will pop up from time to time, called Homemade Homemaking ...... the first post will be about my reusable duster and "swiffer" pads I recently made.

Oh...... and I've started working on my Halloween costume, I've already gotten some of the accessories done and hopefully will be starting on the dress next week (I have to get some fabric dye and a couple other things before I can really get going on that)

Let the 3 months of craziness that is October-December begin! ;)